
Primary question: Why do the edges of PE foam tape lift and how do I stop it?
Direct answer: Find the separated interface first, then check whether part geometry is peeling the edge and whether application left incomplete contact. Compare a replacement PE foam tape only on representative parts after recording the surfaces, process and acceptance criteria; an edge that lifts does not identify a single cause.
An edge can lift while the center still appears bonded. That observation is useful, but it does not tell you whether the problem sits at a substrate interface, within the adhesive or foam, in the joint geometry, or in the installation process. The practical goal is to keep those possibilities separate so a supplier can test a relevant correction rather than send a different roll on guesswork.
Which edge failure face separated, and what were the two bonding surfaces?
Before removing the failed strip, photograph the lifting edge and mark which side faced each part. Peel back only enough to inspect where the separation occurred. Is one substrate apparently clean while adhesive remains on the opposite side? Is adhesive left on both surfaces, or has the foam itself split? These patterns distinguish the location of separation; they do not prove why it happened. A clean-looking face is not, by itself, evidence that the tape grade was wrong.
Record both actual materials and their finishes, not just labels such as metal or plastic. A coating, texture or treatment can change the surface presented to the adhesive. Also note whether the same face fails across several parts or only in one corner. If the failed piece has already been discarded, say so in the RFQ and retain the next sample. Do not diagnose surface energy or contamination without a relevant observation or test.
Record the failed interface
- Photograph the intact joint, first lifted edge and both faces after separation; label their orientation.
- Name each real substrate and finish, including paint, coating, texture or protective film if present.
- Keep a failed piece and an unused piece from the same lot, with the application date if known.
Why do PE foam tape edges lift under joint movement or peel?
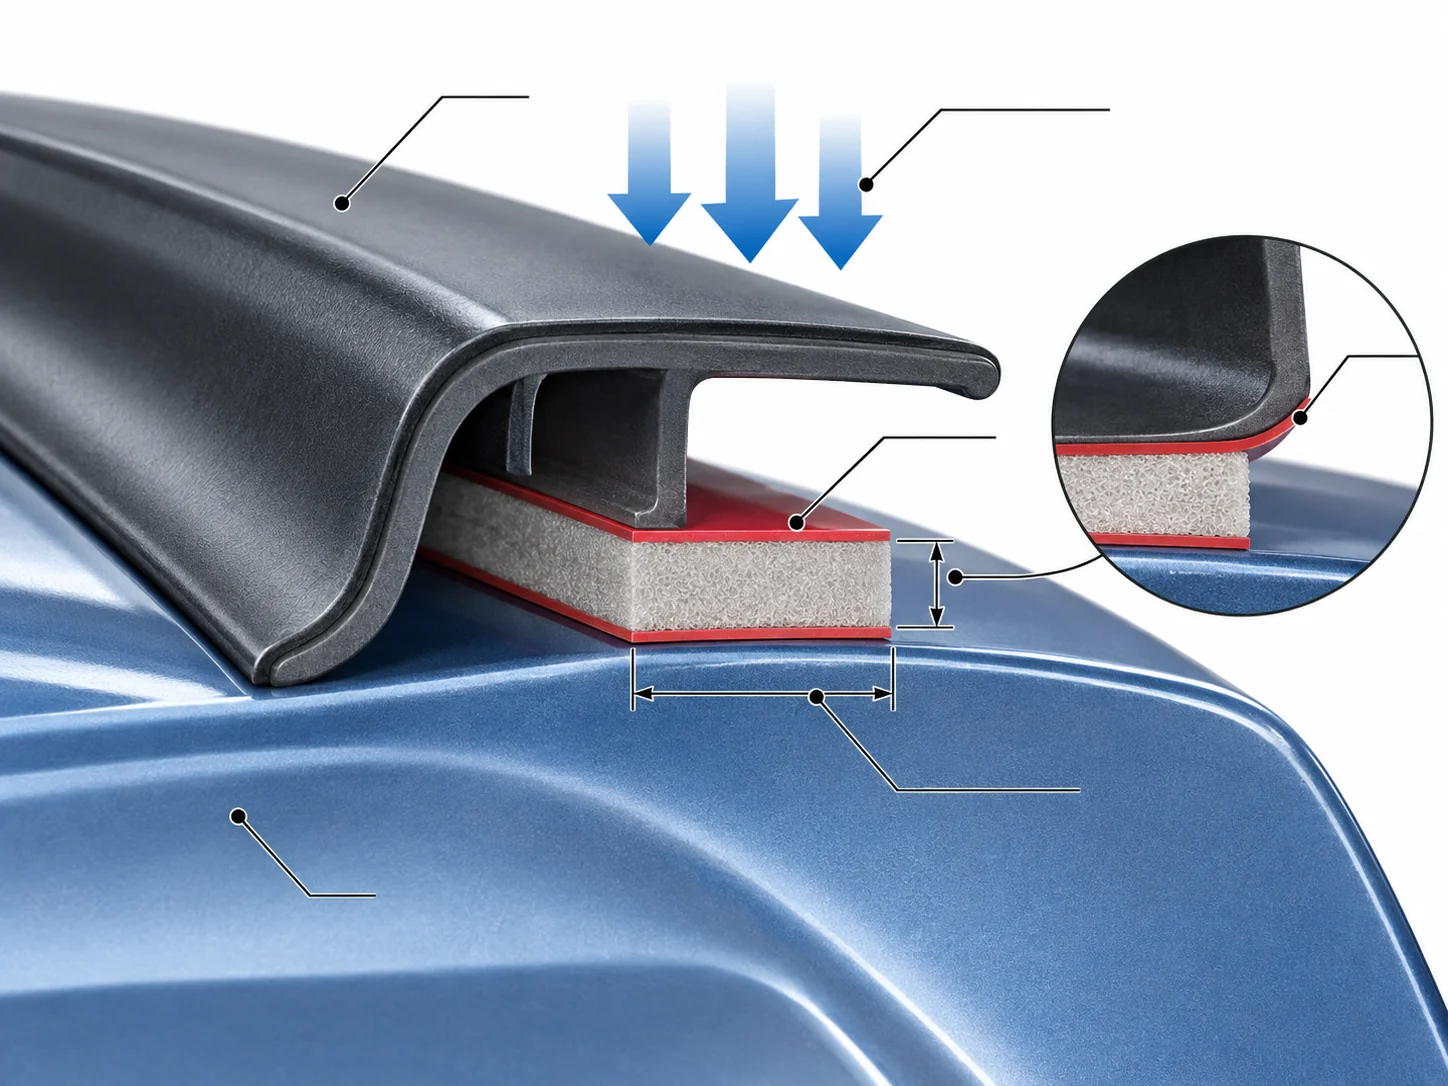
Next, examine how the part loads the bond. A corner that is pried outward, a flexible cover that springs back, or a gap that keeps the part from lying flat can concentrate peel at the first exposed edge. That is different from a joint loaded mainly along its bonded plane. Compare the first lifted position with the part drawing and with any bend, fastener or unsupported span. If the lift repeatedly begins at the same corner, geometry deserves investigation, but the pattern alone is still not a confirmed root cause.
Do not assume a thicker foam or stronger-sounding adhesive will remove an edge-prying load. A PE foam construction may be worth comparing where gap and texture matter, yet one supplier’s product description cannot establish performance for another tape or for this joint. Specify the actual gap, surface texture and expected movement before requesting a construction change.
For construction choices to discuss with a supplier, see the double-sided PE foam tape options; the page is a product-family reference, not a diagnosis of this joint.
Map the joint, not only the tape
- Mark the first lifting corner and the direction in which the part is pulled during use.
- Measure or photograph any gap, curved edge, unsupported span or part flex at the bond line.
- Record whether lifting appears before service, after assembly, or after repeated movement.
If the geometry cannot be changed, compare candidate constructions on that same geometry rather than judging a loose strip by hand. Keep the substrate pair, preparation, bonded area and load direction constant. Where a design change is possible, test that separately so a larger contact area or reduced edge-prying action is not confused with a tape improvement. The useful outcome is a repeatable joint result, not a claim that a material category always solves edge lift.
The PE foam versus acrylic foam tape comparison provides material-choice context after the load path is documented.
Did installation leave incomplete contact at the lifting edge?
Application history matters because a tape cannot be compared fairly if one sample made full contact and another did not. Ask how the surfaces were prepared, whether the liner was removed immediately before placement, and whether pressure reached the full bonded area including the edge. Look for trapped air, folds or local gaps on the failed part. Record application temperature and the time between bonding and loading. These are variables to investigate, not proof that the operator caused the failure.
Supplier application guides discuss cleaning, pressure and wet-out, but their stated numeric settings apply to the particular products and conditions they describe. Do not copy a competitor’s roller force, solvent or dwell time into a PE foam tape instruction. Request the actual candidate tape’s processing guidance and confirm it against the real substrates and plant constraints.
Run a controlled re-application
- Prepare matching representative parts and document the cleaning method approved for those materials.
- Apply the same tape lot using a repeatable placement and pressure method that reaches the edge without trapping air.
- Record temperature, time before loading, edge appearance and the subsequent failure face; change only one process variable at a time.
If the controlled repeat behaves differently from the original assembly, inspect the recorded differences before selecting a new construction. If it still lifts at the same location, revisit interface and load-path evidence. Either way, save both samples. A repeatable process record lets a supplier evaluate whether a candidate grade helps under the same assembly conditions; an isolated successful sample is not a service-life qualification.
What evidence and sample comparison should go with the RFQ?
Send the supplier the joint problem, not only a request for stronger tape. Include a part drawing or clear dimensions, both substrates and finishes, bonded area, gap, load direction, expected flex and service exposure. Attach the failed-face photographs and describe when the lift first appeared. State the tape construction and application method currently used if known. If those details are unknown, identify them as unknown rather than filling in a plausible value.
Define what the trial must show before samples arrive. A buyer might specify a maximum acceptable lifted length after a named exposure or a pass/fail inspection on representative assembled parts; the threshold and method should come from the buyer’s actual service requirement. Without that criterion, a supplier can offer a sample but cannot establish that it meets this application’s need.
Minimum RFQ and trial record
- Part drawing, surface pair and finishes, current tape if known, and labeled failed samples.
- Load direction, corner or gap geometry, assembly method, temperature and time before use.
- Service exposure, quantity and the buyer-defined edge-lift inspection point and acceptance limit.
- Candidate sample identity and a plan to compare it with the current tape on equivalent parts under the same process.
For the sampling conversation, use the custom PE foam tape manufacturing and sampling guide alongside this joint-specific RFQ record.
Evaluate the current and candidate tapes on equivalent joints, keeping preparation and loading consistent. Record not only whether an edge lifts but where the failure occurs. If a sample passes the agreed inspection, confirm that the tested construction and process are the ones intended for production. If it fails, the preserved failure evidence supports the next adjustment to geometry, process or construction. That is a defensible route to an RFQ decision; it does not establish that one PE foam grade suits every surface.
Frequently Asked Questions
Why can the same PE foam tape hold on one surface but lift from the other?
The two surfaces can differ in finish and surface energy, so the adhesive may not make the same contact on both sides. Inspect the failed sample to see which interface separated, then compare the actual substrate pair under a controlled application process. A clean failure face identifies where separation occurred, not by itself which material or process caused it.
Need this construction for a production run?
Get a quote